ADCompVision Documentation
- Author:
Jakub Wlodek
- Corresp Author:
Kazimierz Gofron
- Created:
November 2018
- Last Updated:
June 2019
Installing the plugin
The ADCompVision plugin depends on several external libraries. These include:
Opencv: Can be built from source from github. Otherwise install from package manager.
EPICS, Area Detector, and their submodules, all of whuch can be found on github.
Further installation instructions are located in the README.md file in the top level of this repository.
Using ADCompVision
This plugin allows for a multitude of Open Computer Vision functions. As a result, each function will use the input/output PVs differently.
The main CSS screen for the ADCompVision plugin looks as follows:
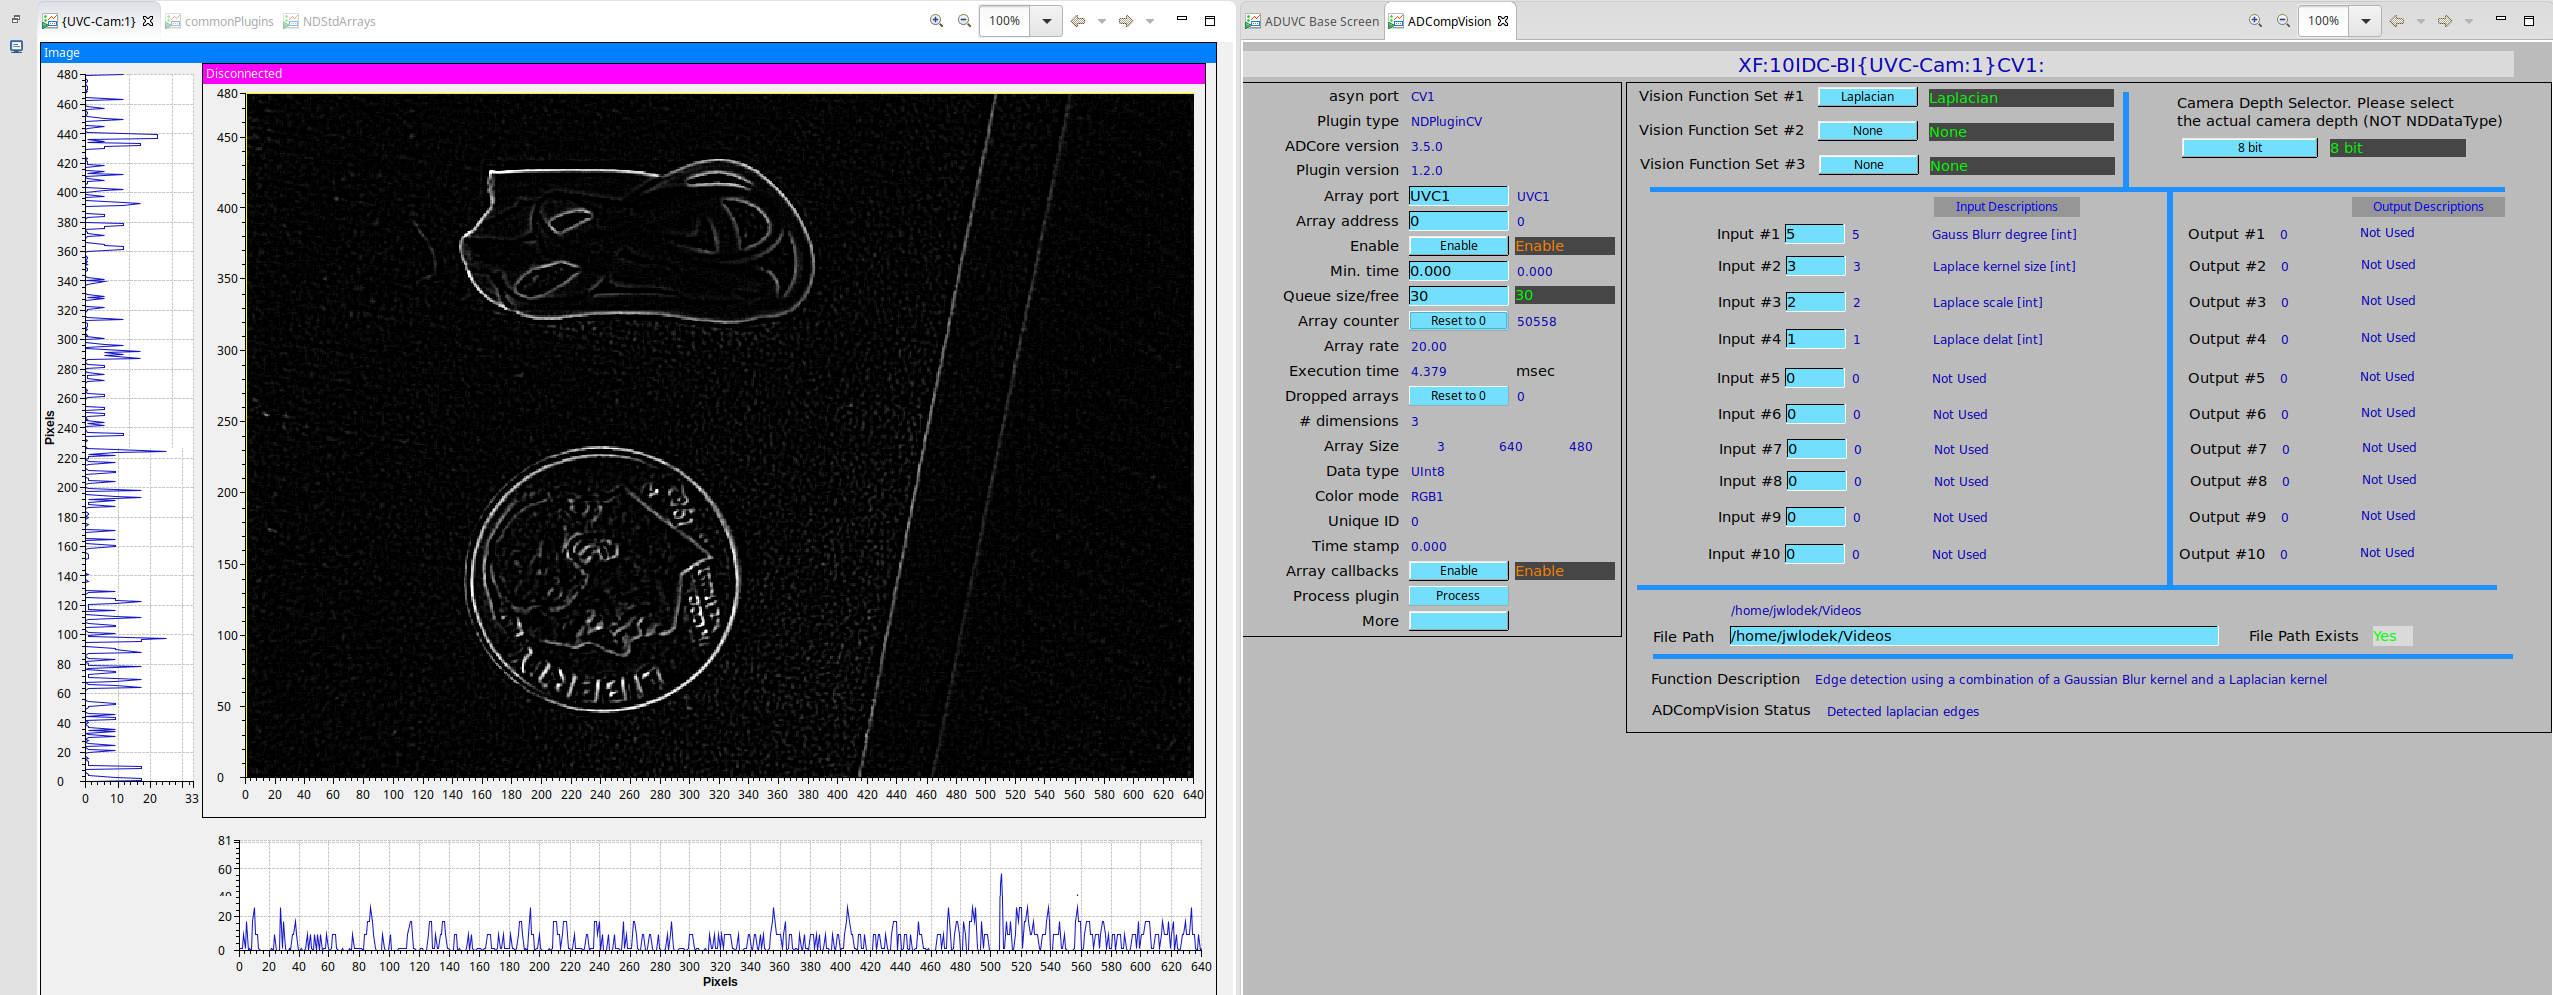
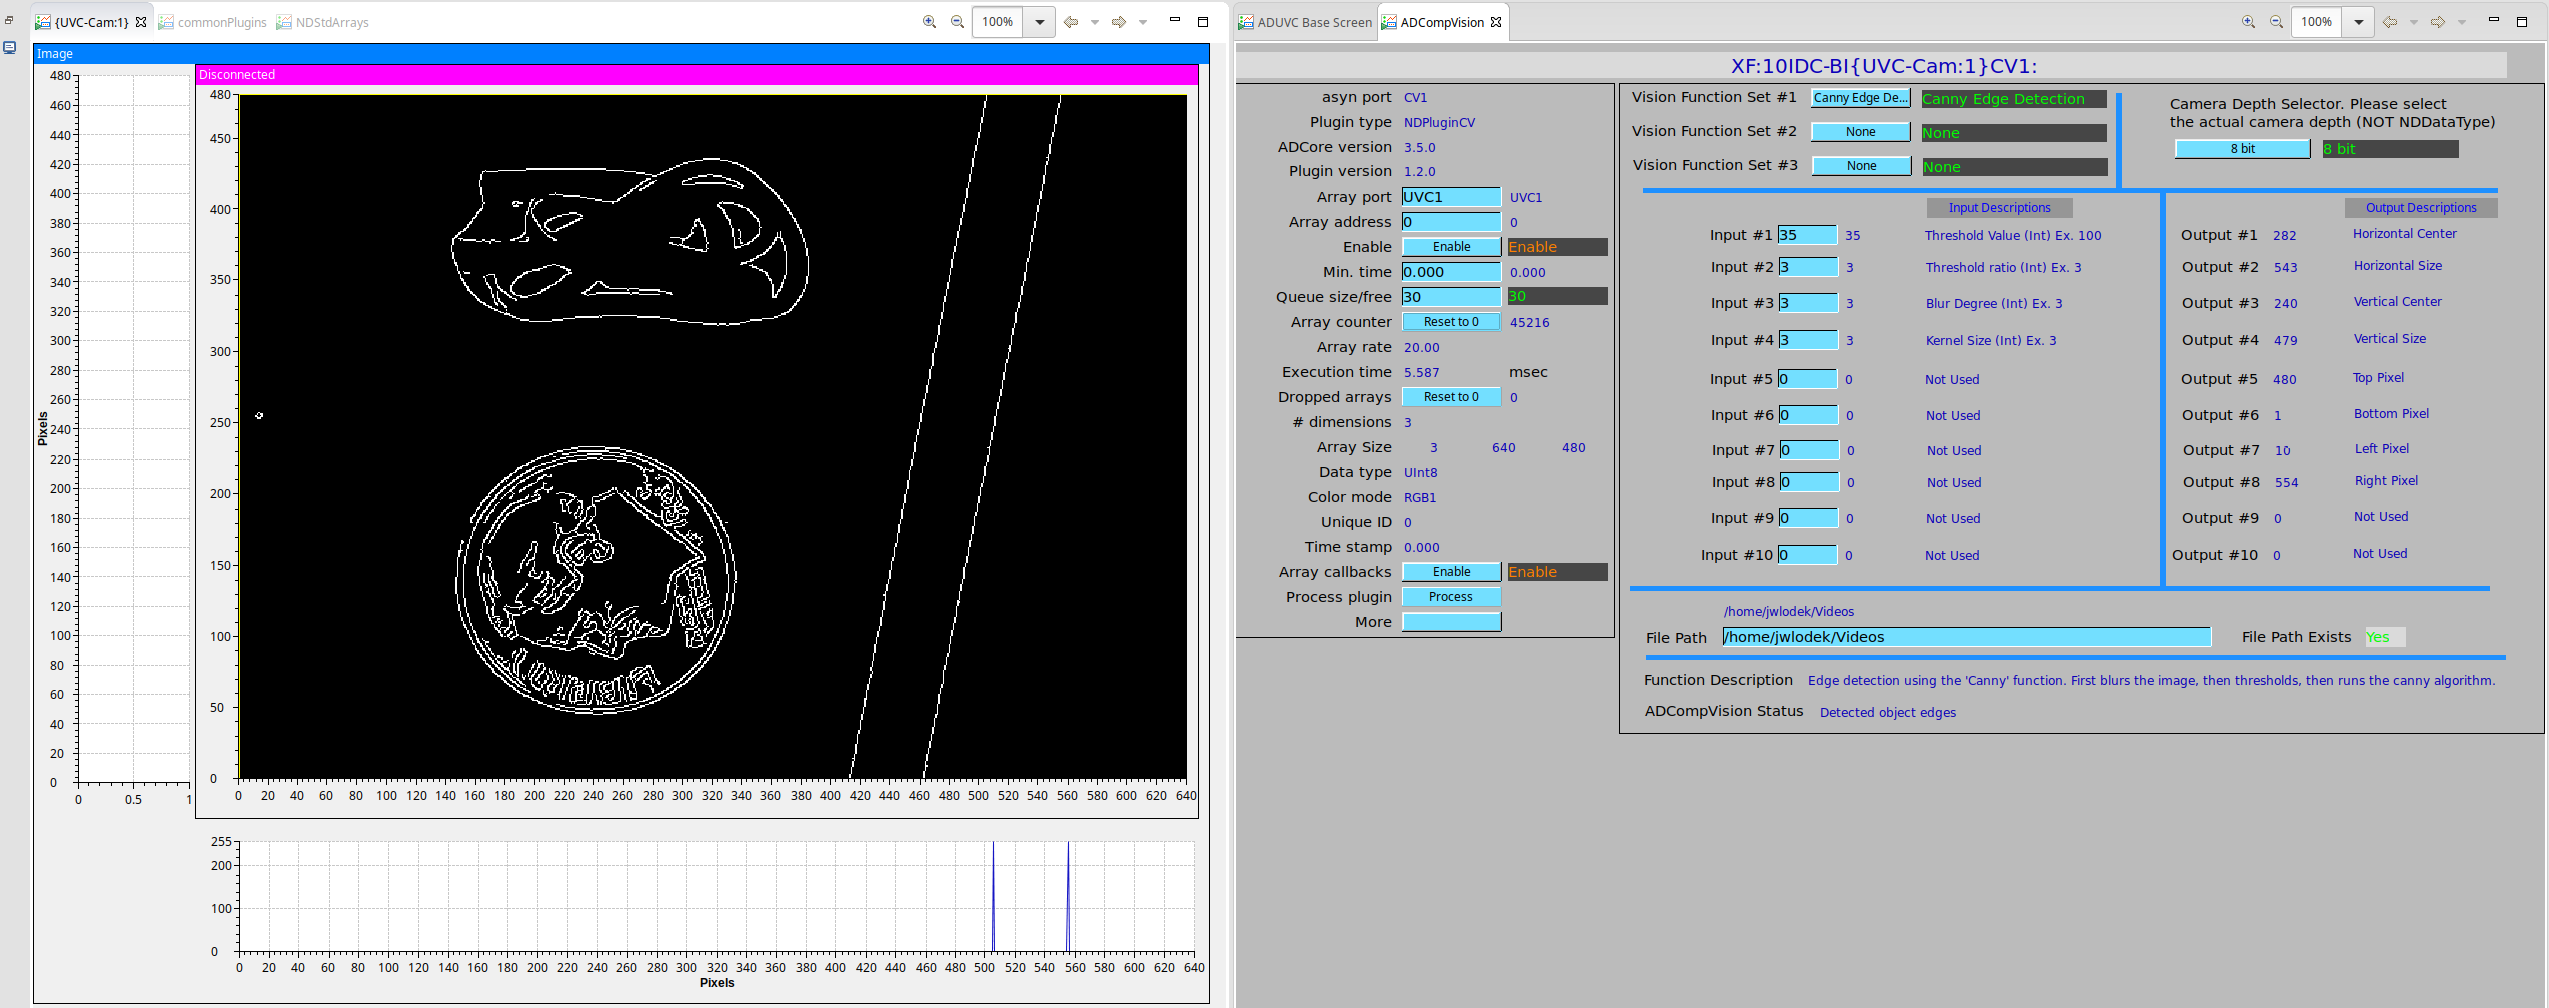
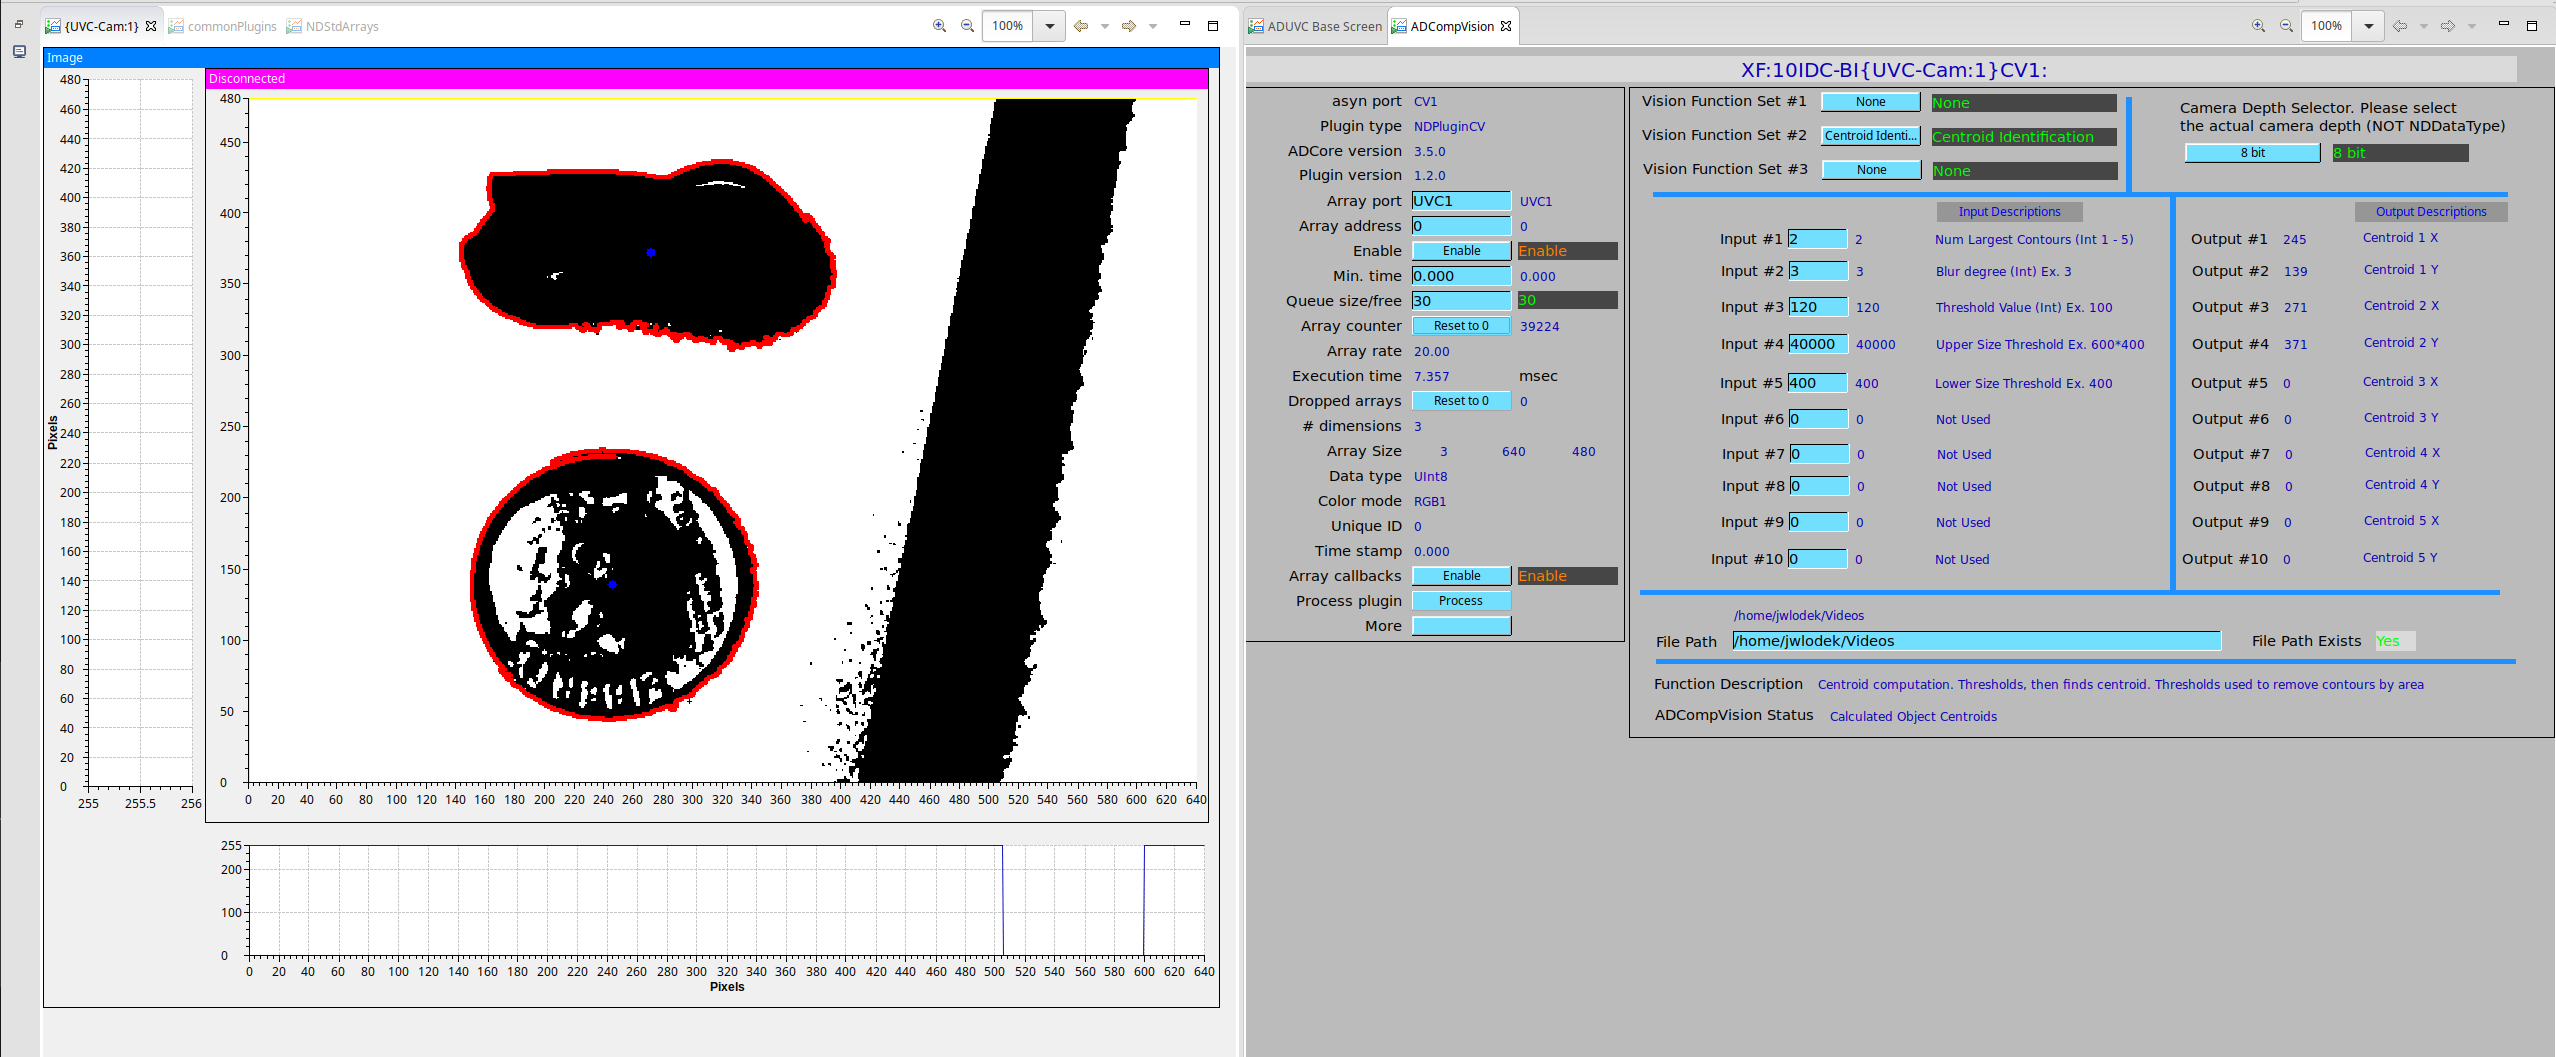
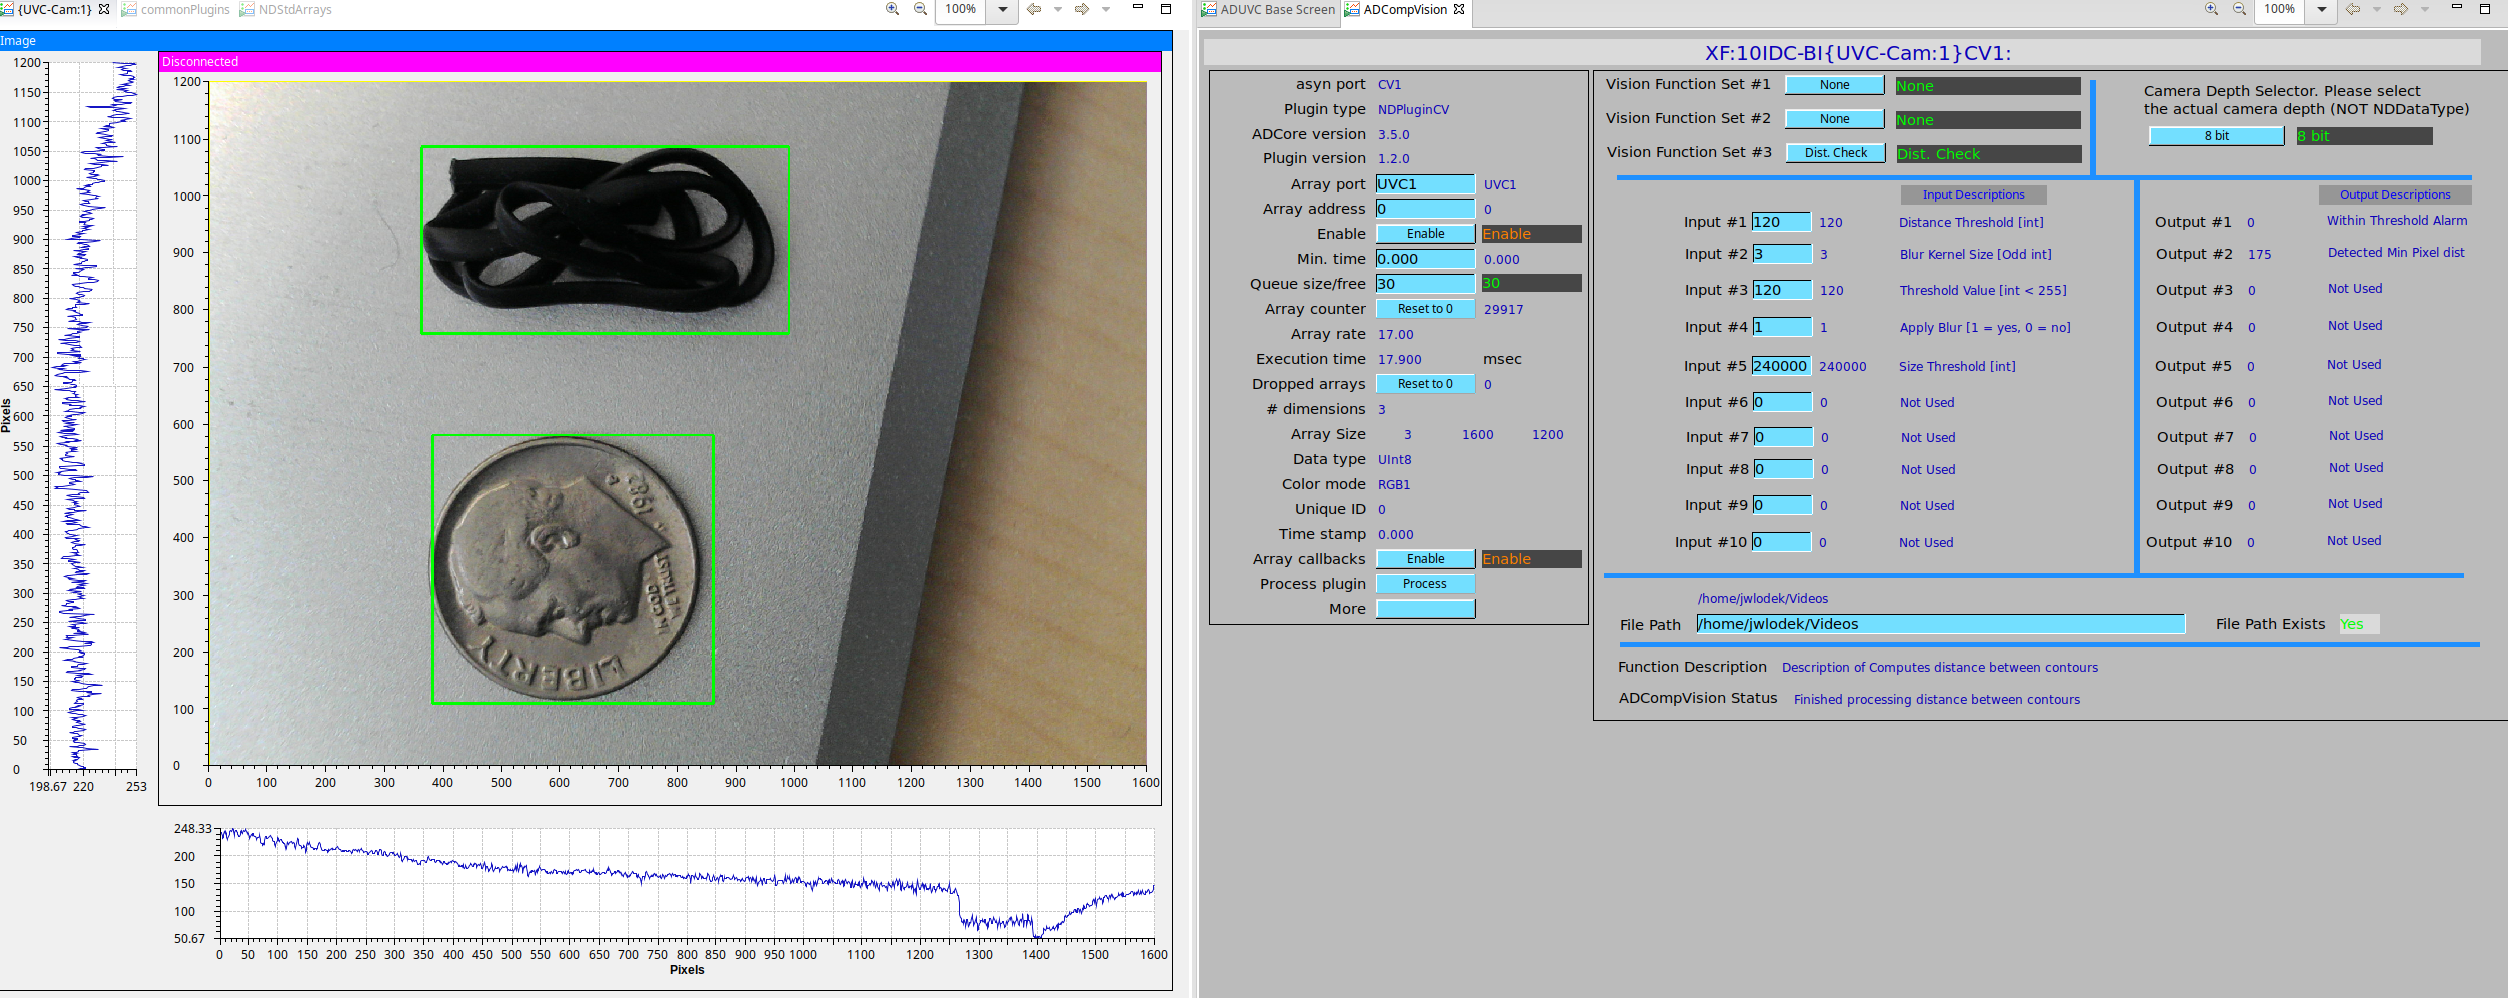
To use the plugin, you must select one of the functions from the three function sets. The other 2 function sets must be set to ‘None’ Then, make sure that the image1 or pv1 plugin has its input port set to be the output port of ADCompVision (CV1). You should pass CV1 to whichever plugin you use to display your images. Then, open the main screen, and note that input and output descriptions are listed for each function. Enter valid input values for each of the required inputs. Next, start image acquisition and enable the plugin. You should see the processed image in image1 ArrayData. Some examples are shown below.
When using non-8bit cameras, note that many of the CompVision functions supported here require the input image to be downconverted to 8 bit in order to work. To do this, select your camera’s actual bit depth in the bit depth selector. (NOT NDDataType). If your device is a 12 bit camera for example, select 12 bit in the menu, not 16 bit, even if the input has an NDDataType of NDUInt16.
Release Notes
R1-2 (5-March-2020)
Computer Vision functions implemented
Video Record - allows for video recording with areaDetector
Convert Format - Converts color format and Data type of input image.
Additional Feature changes
Added filepath PV
Added filepath exists PV
Added opencv_video and opencv_videoio as library dependancies
Added support for multithreading for certain functions
New medm, edm, and adl screens (Courtesy of Mark Rivers)
New rst documentation pages (Courtesy of Mark Rivers
Bug Fixes
Edited mat2NDArray function to remove potential memory leak
Comment + documentation updates
Fixed bug where input pArray data would be placed into the Mat - which would result in data overwrite.
Removed call that added unnecessary DataType attribute
Changed doCallbacksGenericPointer to`endProcessCallbacks`
Cleanup of mat2NDArray function
R1-1 (17-April-2019)
Computer Vision functions implemented:
Sharpening filter
Image subtraction
Image statistics
Distance between objects
Additional Feature changes
File saving temporarily removed due to crashing issues over ssh and additional dependency
Camera bit depth selector added to play better with higher bit images
Image scaling corrected to account for other bit depth images
Minor screen updates to reflect feature changes
Bugs Fixed
Bug where invalid bit depth could cause IOC to crash
Bug where certain PV would cause error at IOC startup
Fixed Image passthrough to work with any bit depth
Fixed colorspace of color images passed through
Removed code that caused certain compiler warnings - Cleaner compile
R1-0 (14-January-2019)
Computer Vision functions implemented:
Gaussian Blur
Thresholding
Laplacian Edge Detection
Canny Edge Detection
Centroid Detection
User Definable Function
Additional Features added
Processed image file saving. (This can work in tandem with NDPluginFile)
Support for mono or RGB images
Support for 8, 16, 32, and 64 bit images
Flexible and modular function implementation system
CSS User Interface screen
Documentation
Known Limitations:
No current support for performing operations accross multiple images. Required for several CV functions
Conversion between PV and ADCV_Function is convoluted and should be reworked
Future Release Plans
Expand list of supported functions
Motion Vectors
Object identification
Image alignment
More…
Perform tests with variety of cameras
Performance improvements and bug fixes
Expand file saving to allow for capture, stream, etc
Usage Examples:
Thresholding
As of R1-0 ADCompVision supports Thresholding. Start by selecting it from the Vision Function 1 dropdown menu. Set the threshold value and max pixel value. The max pixel value will almost always be 255 on 8 bit images.
Laplacian Edge Detection
As of R1-0 ADCompVision supports Laplacian based edge detection. Start by selecting it from the Vision Function 1 dropdown menu. Set the blur degree, kernel size, scale, and delta. Note that the blur degree and kernel size must be odd integers from 1 to 15 (3 usually works best). Tweak these parameters until an acceptable result is visible.
Canny edge detection
As of R1-0 ADCompVision supports Canny based edge detection. Start by selecting it from the Vision Function 1 dropdown menu. Set the Threshold value, ratio, blur degree, and kernel size, note that the blur degree and kernel size must be odd integers from 1 to 15 (3 usually works best). Tweak these parameters until an acceptable result is visible.
Centroid identification
As of R1-0 ADCompVision supports centroid identification. To use this feature select it from the Function set 2 dropdown. Then, set the number of desired objects to find, the blur degree (3 or 5 is usually best), a threshold value, and an upper and lower pixel area threshold for the objects. Play around with these numbers until the desired objects are detected. The centroid centers are then outputted into the ‘Output’ PV values
Video Record
As of R1-2, ADCompVision supports writing video recordings for areaDetector. Controls allow for setting an output framerate, color and mono video, 4 different encoding formats, and 2 file formats. To start a recording, input a valid file path, then enter valid options for framerate and other video modes. Finally simply enter a ‘1’ into the ‘Start/Stop’ field to start recording, and a ‘0’ to stop recording. The video will be saved to the given file path and will be called CV_Output_Vid_$TIMESTAMP.avi or .mp4 depending on selection. Note that not all 4 encodings will be supported on each machine.
Distance Check
As of R1-2, ADCompVision supports Distance Checking between two objects in an image. To use this feature, select it from Function set 3. Then enter a distance threshold in pixels, then a blur size (3 or 5 are usually best), a threshold value, select apply blur = yes (will give better results), and choose an object size threshold in pixels to avoid background noise. Tweak the threshold and size values until the two desired objects are detected, and then note that the output pvs print the pixel distance between them, and whether or not it is under the distance threshold input variable.
Issues and Pull Requests
If you wish to create an issue or pull request, please do so at the source fork on github.
Important Links
copyright: Brookhaven National Laboratory 2018-2019


