ImageJ Channel Access Viewer (EPICS_AD_Viewer.java)
- author:
Mark Rivers, Tim Madden
- affiliation:
University of Chicago, Argonne National Laboratory
This plugin uses EPICS Channel Access to display images via waveform records that the NDPluginStdArrays sends to EPICS.
To use this ImageJ plugin do the following:
Install ImageJ from ImageJ download site.
Copy the entire directory ADViewers/ImageJ/EPICS_areaDetector to the plugins/ directory in the ImageJ installation location. On OS X this can be done with the command:
cp -r ADViewers/ImageJ/EPICS_areaDetector /Applications/ImageJ/plugins
The ImageJ plugins are supplied as Java source code, so you will need to compile the Java code. This can be done in the ImageJ Plugins/Compile and Run menu. Browse for the appropriate source file (
EPICS_AD_Viewer.java) to compile and run it. The compilation step only needs to be done once, creating the required .class files. After this it will appear in the ImageJ/Plugins/EPICS_areaDetector menu.This ImageJ viewer uses the pure-Java libraries for EPICS Channel Access. This means that unlike the IDL Viewer, no C-based shareable-libraries or DLLs are needed. The ImageJ plugin uses the same EPICS environment variables as Channel Access clients that use the C Channel Access library. Note that the environment variable
EPICS_CA_MAX_ARRAY_BYTESalmost always needs to be set, because the default value of 16KB is rarely large enough for images.EPICS_CA_MAX_ARRAY_BYTESmust be at least as large as the largest image size in bytes that you want to display. However, it is important not to setEPICS_CA_MAX_ARRAY_BYTESto an unnecessarily large value like 100 MB, because the EPICS CA library allocates buffers of sizeEPICS_CA_MAX_ARRAY_BYTESwhenever the required buffer size is larger than 16KB. Remember also thatEPICS_CA_MAX_ARRAY_BYTESmust be set for both the IOC process and for the ImageJ client process.Start ImageJ and go to the
Plugins/EPICS_areaDetector/EPICS_AD_Viewerto run the plugin.Type in PV prefix for the NDStdArrays plugin for the detector to be viewed (e.g. 13SIM1:image1:).
The background color of the PV prefix or PV name will change to green and you should see message saying that the PVs have connected. If you don’t the most likely problem is a firewall.
Press the Start button to begin displaying images.
The control window for EPICS_AD_Viewer is shown below. The array dimensions and the number of frames per second actually being displayed by ImageJ is shown. There is a status window that shows whether the EPICS PVs are connected and the number of arrays received since the last update, which is every 2 seconds.
Press the Snap button to make a copy of the current frame in a new window. ImageJ can then be used to process, annotate, etc. that image.
To capture a sequence of images into an ImageJ “stack” select “Capture To Stack”. The image sequence will be stored in the ImageJ buffer and a scroll bar will appear to allow you to scroll through the images. The stack can be saved to disk in a large number of formats, including AVI.
Note that the plugins automatically resets the image image brightness and contrast when creating a new window. This will often provide a reasonable values. To optimize the brightness and contrast use the Image/Adjust/Brightness/Control menu in ImageJ. The keyboard shortcut for this is Control+Shift+C, which is worth remembering. Opening the Brightness and Contrast window will first do an autoscaling, which is often quite good. Pressing the Auto button repeatedly will step through several brightness/contrast settings.
The following is the main ImageJ window.

ImageJ main window.
The following is the EPICS_AD_Viewer plugin control, located in the ImageJ “Plugins/EPICS_areaDetector/EPICS AD Viewer” menu.

ImageJ EPICS_AD_Viewer plugin control window
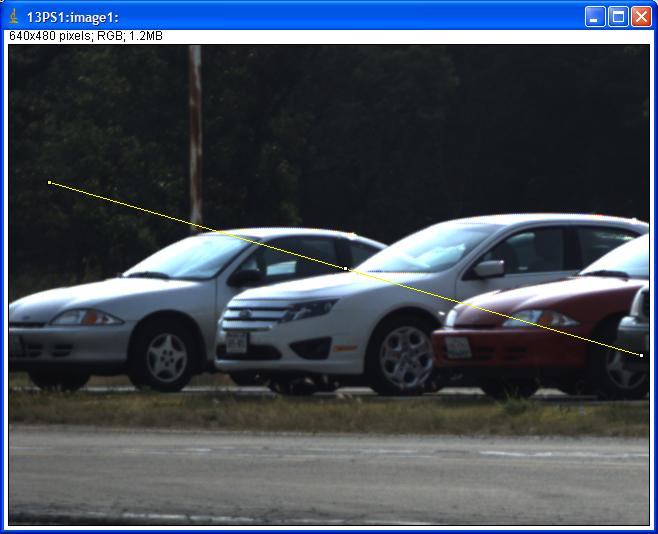
The following is the image display window, which will appear when the Start button is pressed in the EPICS_AD_Viewer control window.

ImageJ EPICS_AD_Viewer plugin display window with line selection

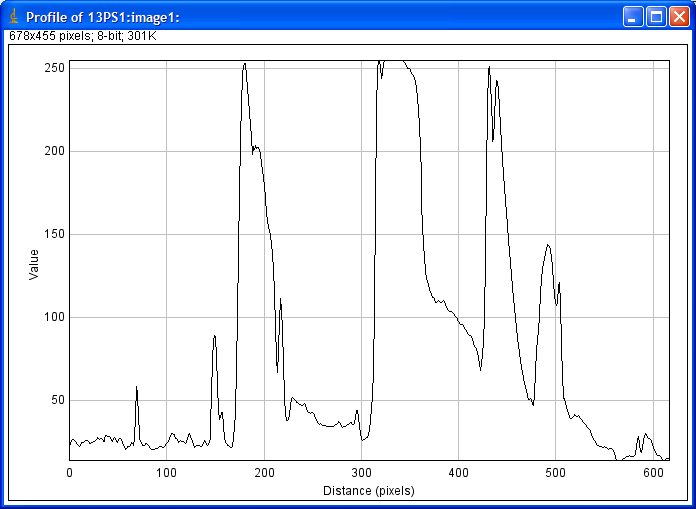
ImageJ EPICS_AD_Viewer dynamic line profile of the above image